Replace the Speedo battery
Phillips Screwdriver
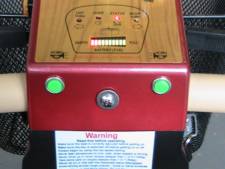
1. Remove the screw on the front of the dashboard between the horn buttons and tilt the top of the dash up and towards the front of the scooter.
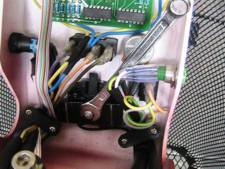
2. Using a 7mm spanner, remove the Nylock nut that holds the securing plate on to the back of the speedometer. Remove the securing plate and the threaded securing pin will slide downwards to free the speedometer and harness.
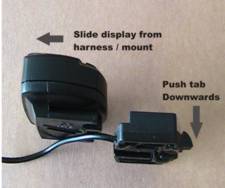
3. Separate the speedometer display from the harness by pressing the extended plastic arm. The display will slide out from the harness casing.
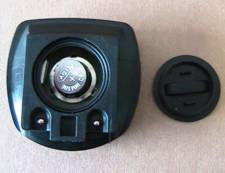
4. Open the battery compartment, remove the old battery and replace with a new LR44 or equivalent. Care should be taken not to touch the battery directly with bare hands as this will shorten the life of the new battery. Replace the battery compartment cover.
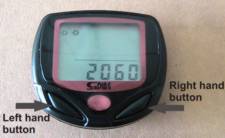
5. The display will show "2060" by default with the right hand zero flashing.
Using the right hand button on the speedometer, scroll through the digits until the correct number is displayed. Press the left hand button to change the next number in the sequence. Repeat until all four digits are correctly set for your model of scooter as follows:
Lotus Blake Montana = 1001
Lotus Blake Esteem = 0813
"Km" will flash on the display. Select either Km or M (miles) by using the left hand button and set / save your selection with the right hand button.
6. "00:00" will show on the display. To change the time press the left hand button for three seconds - You can choose either 12 or 24 hour clock times by selecting with the left hand button and setting / saving your selection with the right hand button.
The hours panel will now be flashing. Set the correct hour reading by scrolling through the digits with the left hand button. Press the right hand button to set your selection. The minutes panel will flash. Press the left hand button until the correct time is shown. Set / save the minutes with the right hand button.
Re-assembly:
Re-assemble the components in the reverse order to disassembly above.