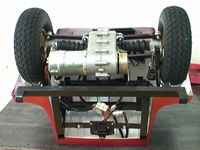
Gear Box Assembly
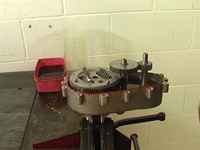
All parts should be clean. Mwith seals and bearings replaced if
required. Mount the gearbox halfcase with the bolt threads in a vice
clamping by the suspension arm. Install the crown wheel, middle gear
and then drive gear. Apply loctite master gasket or similar to the
sealing surface. Put in 200ml SAE90 gear oil. Put top half on and
match using 2 x 5mm drill shanks.
Install and tension bolts.
Install and tension bolts.
Gear Box Disassembly
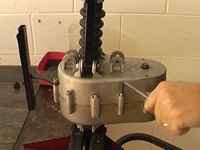
Mount the gearbox in a vice clamping by the suspension arm with the
bolts facing up. Remove the brake nut and the bolts around the
middle of the case. Tap with a hammer to break the master gasket
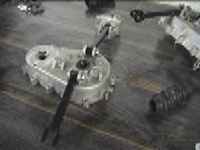
glue and lift off the upper case. remove the drive gear and middle
gear and then lift out the crown wheel assembly.
Axle Seal Replacement
The axle seal can only be replaced by dismantling the gear box.
Remove the c-clips ( there is sometimes 2 on earlier models ) from
the axle shaft inside the gearbox. Remove the axle shaft. Remove the
seal and clean seal surface and install new seal and lubricate. You
may need to use a copper hammer. Polish the axle shaft where the
seal and bearing runs and reinstall axle shaft with new c-clips.
Drive Boot Replacement
The drive boot can be replaced in the scooter or while the transaxle
is out of the scooters. Remoev the front trailing arm bolt and the
lower stub axle bolt and fold the stab axle of the axle shaft.
replace drive boot using lots of lithium grease. Important.
Make sure that the rear wheels have the correct preload. You must be
able to just turn the axle collar. Adjust using copper shims.
ReFit the Transaxle Assembly

The transaxle goes back in as a complete assembly. All reapairs or
maintenance should have already been done. Sit in place and install
3 mount bolts. Connect trailing arms and shock mount. Refit motor
and brake assemblies. Refit wheels and tyres. Important.
Make sure that the rear wheels have the correct preload. You must be
able to just turn the axle collar. Adjust using copper shims.
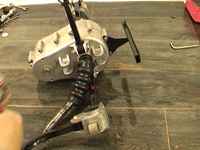
Remove the Transaxle Assembly
The transaxle comes out easliy. Remove the wheels, motor and brake
assembly. remoev the shock mounting bolts, trailing arm bolts. Then
on the top side of the transaxle remove the 3 mount bolts. On
eallier models this is the 4 spider arm nuts. The transaxle comes
out as a complet unit. Do not dissassemble suspension arms and
bushes whilst the transaxle is in the scooters.
Refit the Tiller Shroud
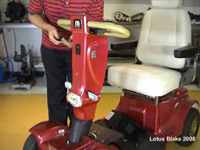
The tiller shroud is easy to refit in a few minutes. Connect the
keyswitch and charger. Then peel off the shroud and position
correctly. Fit the indicators and side screws loosely at first. Make
sure you have the correct wiring for left and right indicators.
refit the headlight using the retaining springs. refit the rear
cover, throttle boots and top dash. Install front basket.
Remove the Tiller Shroud
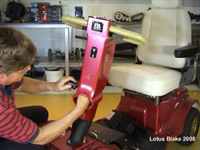
The tiller shroud is removable in a few minutes. remove the Nasket
and bracket, flip back the top dash and remove the throttle boots.
Remove the rear panel and from behind unhook the headlight retaining
springs. Remove the indictors and 2 side screws. Peel the tiller off
taking note of the Keyswitch and charger screws. Access to the
wiring loom and electronics is now obvious.
Change a Tyre on a 4 inch rim
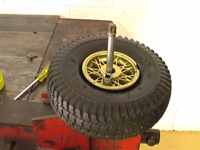
Here I am using a 3/8 and 1/2 socket bar in a vice. Use lots of
liquid soap. On the smaller 4 inch rim there is a cut out that acts
as a slot to rotate the tyre off the rim through. The tyre must be
taken off over the smaller inside bead. Important.
Make sure that the rear wheels have the correct preload. You must be
able to just turn the axle collar. Adjust using copper shims.
Code required for additional access